Showing posts with label cooking. Show all posts

Wednesday, October 8, 2014

Leftover Italian Bake

So, I originally set out to bake a WWII Wartime Loaf today, however, much to my sadness, when I tested the yeast it had gone bad & I simply didn't have the energy to go to the store to get more. So it was a no go. Total bummer because I was looking forward to some bread and jam for my breakfast tomorrow. I guess I’ll be having cereal like the kiddos! Anyways, I decided to take a break from history and instead bring you an easy recipe that I concocted using leftovers from last night and stuff I had in my fridge.

In the spirit of frugality --- which was, historically speaking, very important ---
…and in the love I have for Italian food, I bring you...

Leftover Italian Bake!


Ingredients:

Left over noodles with sauce **any noodle that has spaghetti sauce cooked from the night before will do (I had approx. 5 cups of Penne Rigate noodles with meatballs)
1 cup tomato purée or sauce (about 1-10.75 can)
2 Tablespoons of cream cheese, cubed
1 egg
1 tablespoon Italian seasoning
1 Teaspoon Salt
1/2 cup shredded Parmesan
1/4 cup shredded Parmesan (for top)
1/2 cup shredded cheddar or mozzarella cheese
1/2 cup shredded cheddar or mozzarella (for top)
Casserole dish - approx. 2 qt.


Directions:
Preheat oven to 375*F. Cube cream cheese. Toss cream cheese, egg, leftover spaghetti, tomato sauce, Italian seasoning, 1/2 cup Parmesan & 1/2 cup cheddar (or mozzarella) in a bowl & mix well. Place the mix into a casserole dish. Cook uncovered for 25 minutes. Remove from the oven. Mix the bake -- mixing the cream cheese well. Place remaining cheese on top of casserole. And cook an additional 10 minutes.
Mix all the Ingredients together. Bake 375 for 20 minutes.

After 20 minutes in oven, mix ingredients once again and top with cheese. Bake for another 10 minutes.
 
Once done, let the bake rest for a couple of minutes. I broiled old hamburger buns topped with butter and garlic for a frugal garlic-bread side dish while the bake cooled. 

Voila! A Tasty second-day meal from leftover pasta.  

You'll notice that I used Penne Rigate with sauce and meatballs for my base, truly, this recipe can be altered, added too, and changed based on your tastes & what you have on hand. All in all it's a great way to use up those spaghetti leftovers.

So put on some Luciano Pavarotti, pour a glass of your favorite Italian red wine and enjoy some second-day Italian cuisine! 
Ciao XOXO, 
TheHistoryGirl

Saturday, September 27, 2014

Baked "Fried" Chicken Recipe

Ah, the family.  Gathered around the table on a Sunday after church, eating mama's Fried Chicken. 

Fried Chicken brings us all home and it is a true comfort food.  

It's also one of my favorites.  It reminds me of a certain kind of kitsch.  A yearning for days past when life was easy and not so very complicated.  

So, today I invite you to a not-so-long ago past, during a time of family meals with no cell phones or laptops.  When we all had a hankering for a home cooked meal that hit us right in our soul.  

I invite you to a Sunday dinner of yesteryear....


Retro "Fried" Chicken Dinner

Yesteryear's Sunday Family Tradition


In truth, I don't often have the patience to cook long meals and it is a true shame because when I put in a little effort it almost always turns out for the best.  And today, I really wanted to make our meal special -- call it a hankering for some good ol' homecookin'.  I came across a recipe from RecipeCurio that I knew I had to try.  It got me thinking, though about Fried Chicken, and, although fried chicken is nothing new, I really wanted to focus on our love of all things vintage-kitsch Fried Chicken.  


(Image: Judy Garland frying Chicken in 1955). 


Think KFC in the 1960s...

(Retro KFC Bucket, KFC Ad circa 1968, Early KFC Restaurant)

Quick versions of fried chicken entered the "fast food" world in the 1950's and 1960's with the rise of deep freezers and fast food restaurants.  At the beginning of the upward trend in all things convenient, fried chicken was right there along with hamburgers and french fries. KFC, local fried chicken shacks and the ever-so-kitsch TV dinners were extremely popular. 


However, convenience fried chicken could never replace the homecooked versions.  And recipes, coming out in magazines (from the 1920s through the 1960s and beyond) as well as in new fangled cookbooks, were a dime a dozen: 


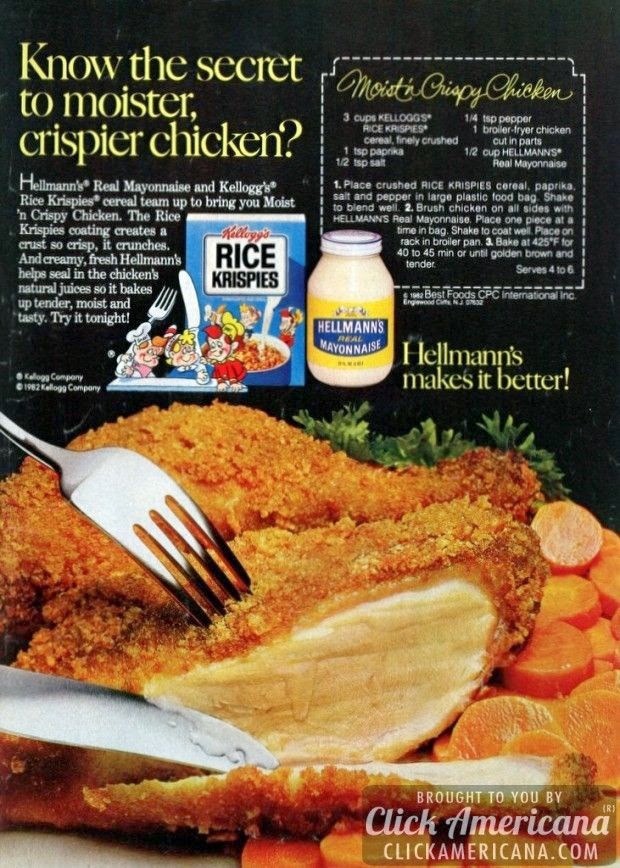
I love to look through old recipes, and, fried chicken recipes are always eye catching.  Each family has their own version and their own kind: Southern, Spicy, Corn-Flaked, Breadcrumb-Breaded, and finally, the version I tried, Rice Crispy coated. The different kinds of Fried Chicken may be various in cooking methodology with fans of each but they all have one thing in common: a delicious & comforting homecooked-taste.

And now on with the recipe...

Baked Fried Chicken

Recipe Provided by RecipeCurio.com

(A Printable Version Link Provided at End of Blog)


I stayed pretty true to the recipe with the ingredients, only subbing out two packages of chicken breast for the fryer chicken and the garlic clove for dried.  It was super delicious and it has since been added to my family's meal rotation.  


Ingredients: 
  • 2 Packages of thin cut chicken breast OR 1 package of thick cut chicken breast OR 1 Fryer chicken. 
  • 4 Cups Rice Krispie Cereal
  • 3/4 Cup Grated Parmesan Cheese (or Romano or mixed)
  • 2 Teaspoons Salt
  • 1/8 Black Pepper
  • 1 Teaspoon each: Garlic Salt and Garlic Powder (or 1 Clove Garlic)
  • 1/4 chopped parsley (I used dried)
  • 1/2 Cup Butter

Directions:
Preheat oven to 350 Degrees.  Melt Butter in microwave for 45 seconds or until melted. *Here is where I differed in methods from the above handwritten recipe: I did the shake'n'bake method.* Combine dry ingredients in a large ziplock bag.  Crush the Rice Krispie Cereal in the bag and make sure all the Parmesan Cheese is clump free. Dip chicken in butter and add to the ziplock bag. Once all the chicken is in the bag, seal it up, and toss until all the chicken is well-coated with the Rice Krispie mixture. 

Once the chicken is coated add to a baking pan in an even layer (if using Fryer Chicken - place skin side up).  I covered the chicken with remaining Krispie mix.


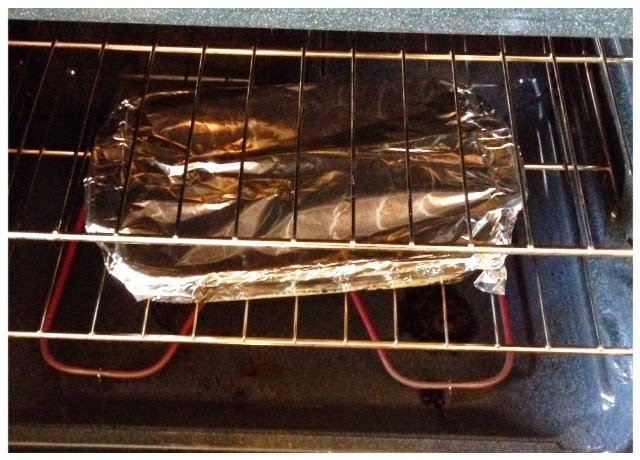
Place Aluminum foil over the baking dish and pop it in the oven. 


Bake for 45 minutes to an hour.  Do not turn the pan once in the oven.  

It came out perfect, and I made some truly vintage sides to go with the baked "fried" chicken.  And it really did taste like I had fried it!

Some good old fashioned mashed potatoes and gravy with green beans and country white bread rounded out the baked "fried" chicken meal.  It was a real winner!

(All recipe's provided by http://recipecurio.com/ and images from Pinterest: http://www.pinterest.com/mamanikkiwilson/)
http://www.pinterest.com/ (Searched Images)

Enjoy this very vintage KFC commerical!

Click for the Printable Recipe 

Wednesday, September 24, 2014

Um, what is it?

Imagine you are seated at the head table of a grand Medieval or Tudor feast. The king and queen are only a few seats down (for you are nobility, of course). Dish after dish has been served up and all the guests including the king and queen are awaiting the main event. All have been promised a spectacular show.

And lo and behold the main event is presented...

...and you find that you have been served up an animal so exotic, so bizarre, and so absolutely absurd that all you can do is laugh in utter astonishment and delight.

What have you been presented with, what is it?


You have just been served the exotic Cockentryce.

Presenting: The Cockentryce and Coqz Heaumez

Chimera Animals & Other Showmanship Pieces of Medieval and Tudor Feasts


According to Gode Cookery, "A cockentrice was made by combining a pig and a capon into one creature, thus creating a "new" animal that would not only feed hungry folk but amuse and amaze them as well. "Cockentrice" is actually just one among many spellings of the name of this dish; originally the beast was also known as a cokagrys or cotagres, from "cock" (a capon) and "grys" (a pig); a "gryse" was a suckling pig. Other period spellings include koketris, cocagres, cokyntryche, cockyntryce, and cokantrice. Cockentrice were common entries at great dinners, and a cokyntryche is listed among the many feast items at a festival given by John Stafford, Bishop of Bath & Wells, on September 16, 1425" (godecookery). 

Cockentrice's were an excellent example of the exotic and showmanship theatrics that the grand Medieval and Tudor feasts were known to have carried out.  

Heston Blumenthal, known for his theatrics in creating gastro-inventive dishes creates the Cockentrice in the video above.  Although his Cockentrice is extremely elaborate, the spectacle of the beast has the same mischievous fun that would have been found in the best of Medieval and Tudor banquets.  
I can imagine that the guests of Heston's Tudor dinner party are just as delighted as guests of those long ago feasts! Along with the Cockentrice, the mythical and imaginative chimera animal served up at grand banquents, one could also find the odd and amusing Coqz Heaumez or the Helmeted Cock.  

Helmeted Cock?

Yes.  Helmeted Cock.

According to Gode Cookery, "Serving almost as a sort of companion to the Cockentrice is the Coqz Heaumez, or Helmeted Cock, another fantastic combination of pig and fowl, which appears in the Medieval French Cookbook of Guillaume Tirel, known today as Le Viandier de Taillevent," (godecookery 2). 

Accompanying the Cockentrice was the humorous and resplendent Helmeted Cock.  
Yes, your eyes do no decieve you, for that is indeed a fowl riding a pig into battle wearing robes while holding a lance.  

Could you imagine being served up such a delight?  I certainly could not!

The Supersizers Go (a delightfully hilarious show you just have to check out, which is available on Hulu and YouTube) presented a medieval feast complete with the Helmeted Cock.  It was truly a gastronomic delight and I was jealous not to be among the guests watching the spectacular show. At least I can watch the video! 


So, now you are fully versed in a few Franken-animals presented in the fanciful banquets of Medieval and Tudor feasts.  Now, I am off to eat something...fresh & simple...and not meat...like an apple. 
XOXOXO,
TheHistoryGirl


Monday, September 22, 2014

The First Post: Stuart Era Dinner Rolls

My first post I will dedicate to food because, after all, food connects us.  It is a shared love that we all have and have had throughout the ages and around the world.  My love of history is often translated into food and I share my adventures with my two little boys and my husband, who for the most is a good sport (the kids not so much).  Depending on how you look at it, the unfortunate or fortunate aspect of cooking from historical recipes (especially the REALLY old ones) is that we don't typically have the same cooking techniques or even food sources.  After all, I don't have a spit boy roasting pigeon, pheasant, turkey or chicken over an open fire and I don't often have access to freshly killed venison or peacock! I don't have an open hearth in my kitchen (in fact the fireplace in the living room is gas and isn't currently operating) and I don't have the time (or energy!) to cook over an open flame for every meal.  So, it is with my trusty oven and stove top, KitchenAid mixer and blender, food processor and George Foreman grill, propane grill and other convenient modern tools that I find myself cooking with the adaptions of modern appliances. But, that doesn't mean the connection is lost.  Baking a pie that contains meat and fruit or using the same spices as they did in the medieval times brings us to a very small understanding of our early ancestors, or at the very least can elicit a dialogue about how they ate, why they ate what they did, and exactly what did they eat! I find that when I cook using a historical recipe I am in some way honoring my ancestors or my ancestors country of origin.  And by using my modern appliances, I am cooking in such a way that my children can help and history really can be brought to life for them and for myself.

Now on with the first adapted recipe...

Principe Bread Loaves

Recipe Adapted from The English HusWife by Gervase Markham

Published in 1615 (Isn't the name Gervase marvelous?!) 


Ingredients:
  • 6 Cups all purpose flour (or more)
  • 2 teaspoons salt
  • 1 packet instant rise yeast
  • 2 1/2 cups water, warm, (AKA microwave 1 minute)
  • 1 Tablespoon cornstarch
  • 1-2 teaspoons oil
Directions: 
Using a KitchenAid mixer and the dough blade: combine 5 cups flour, salt, & yeast. Mix slowly, gradually adding the water.  The dough will be super sticky and wet.  Stop mixer and scrap down sides.  Continue mixing, adding just enough flour in order to remove the sticky dough.  Place dough on a well-floured surface and add remaining flour. Knead in the flour until dough is able to be worked and not overly sticky.  (I found that I had to add a little more than a cup of flour.  I added enough to be able to successfully pick up the dough and place it in a bowl).  Place dough in a well oiled large bowl.  Place plastic wrap over bowl.  Let sit for 3 hours.  
After 3 hours, place dough onto floured work surface. Divide dough (adding flour to dough if needed) into 12 - 16 small pieces. Place cornstarch evenly onto a large baking sheet. Knead and form each little loaf into a round ball and place onto the pan (the cornstarch helps the rolls not to stick to the pan). Let the small loaves rest for about an hour (they will get a little larger).  
After an hour, preheat oven to 500 degrees. Once preheated, in a small glass or ceramic baking dish add 1 - 2 cups of water and place inside the oven on the lowest rack.  On the middle rack, place the rolls. Bake 10 minutes and then turn the pan around and bake another 10 - 12 minutes or until golden brown.  Once done, remove from oven and cool for about 5 minutes before digging in (to make these really delicious I added a little melted butter to each roll on top).

Verdict:
The rolls were very tasty but a little time consuming.  Luckily, they yielded many little rolls and we can eat these for a few more dinners.  All in all I think I'd make these again; the ingredients were simple and if I have a day were I can devote to popping in and out of the kitchen from time to time it is worth the effort.  The crust was really crispy and I love a good crispy crust with a soft chewy center!

(A little history note: The commonly known Stuart Era refers to a period in British History between 1603 and 1714.  The House of Stuart ruled the land and this period was ripe with turmoil and conflict, including a civil war! William Shakespeare was a playwright partially in this era having been born around 1564 and died in 1616. I love all things Shakespeare and am even proud to say that Joan Shakespeare is my 12th Great Grand Aunt by marriage... it might be a small tenuous connection to all things Shakespeare but I'm holding onto it for dear life!) 

XOXO,
TheHistoryGirl